
How to Sign a Document with Talking Tree
1. Open the Signing Link
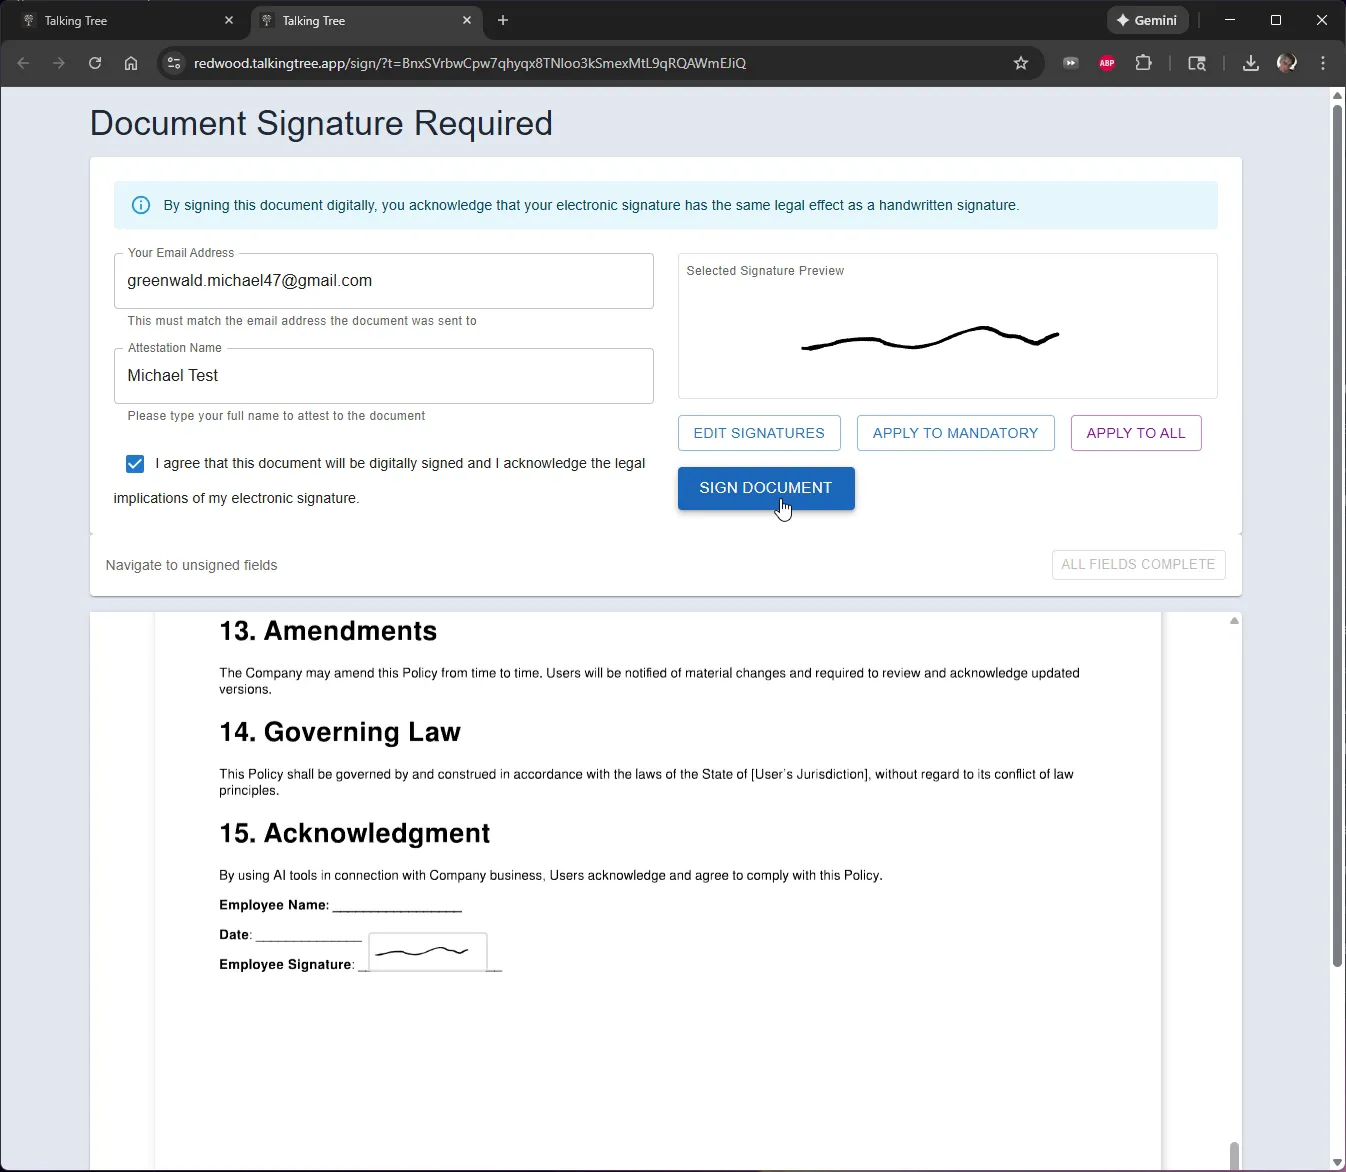
Open the signing link sent to your email. The Document Signature Required page loads, showing the document and the fields you need to complete.
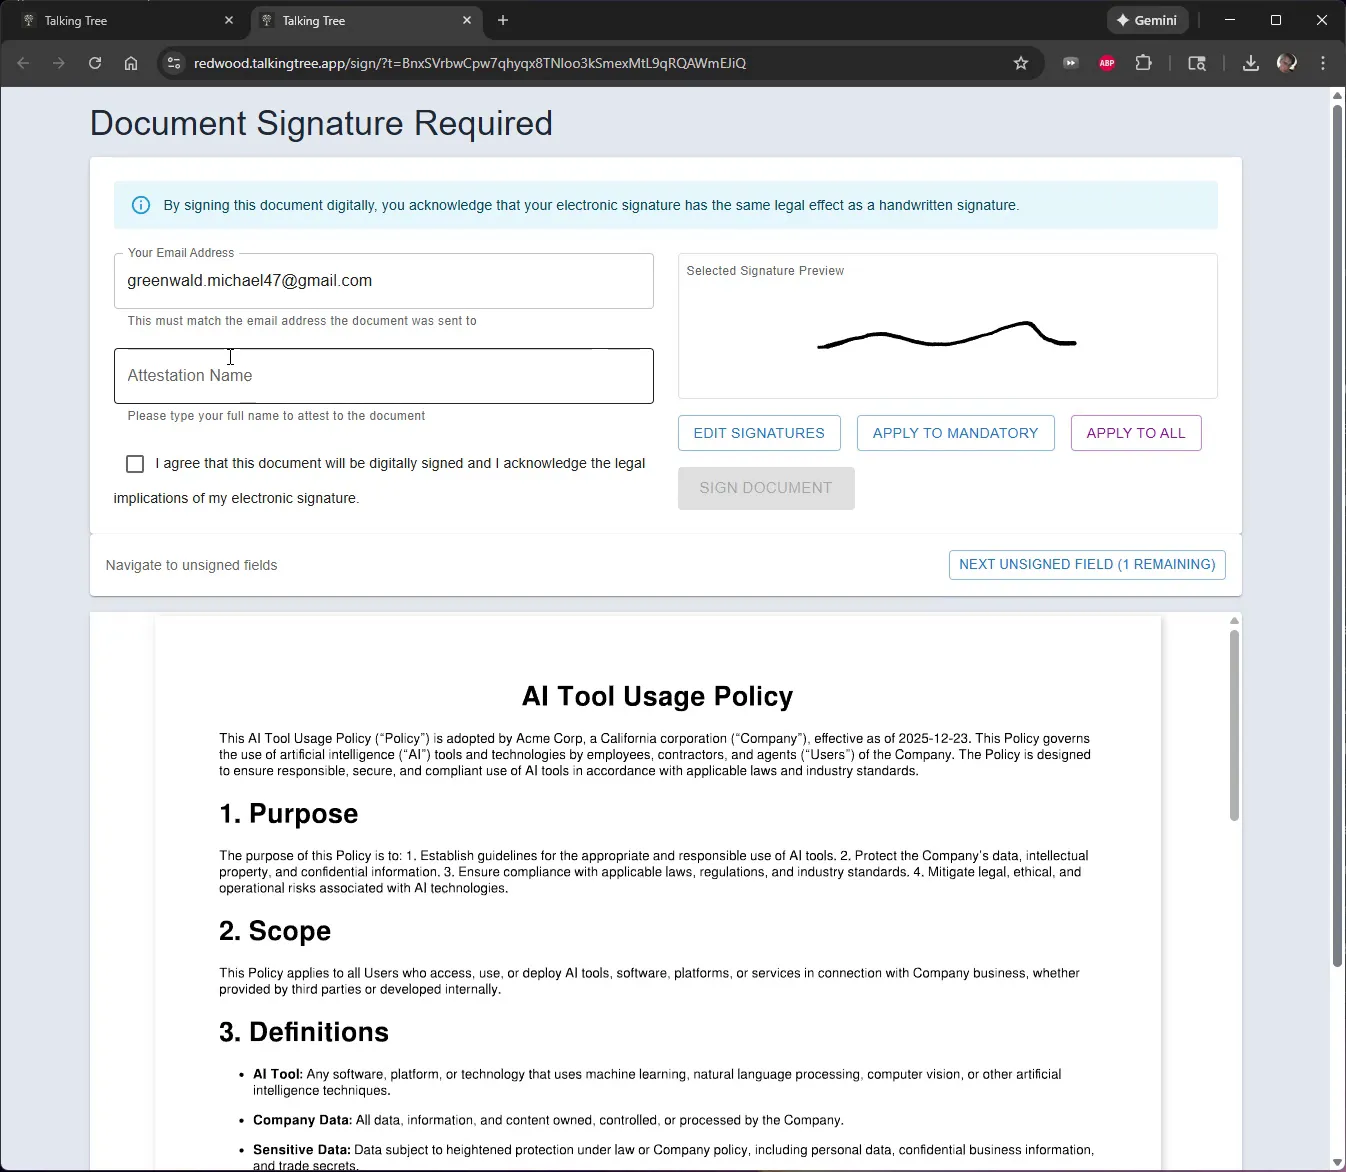
2. Enter Your Attestation Name
Type your full name into the Attestation Name field to attest to the document. This name must correspond to the email address the document was sent to.
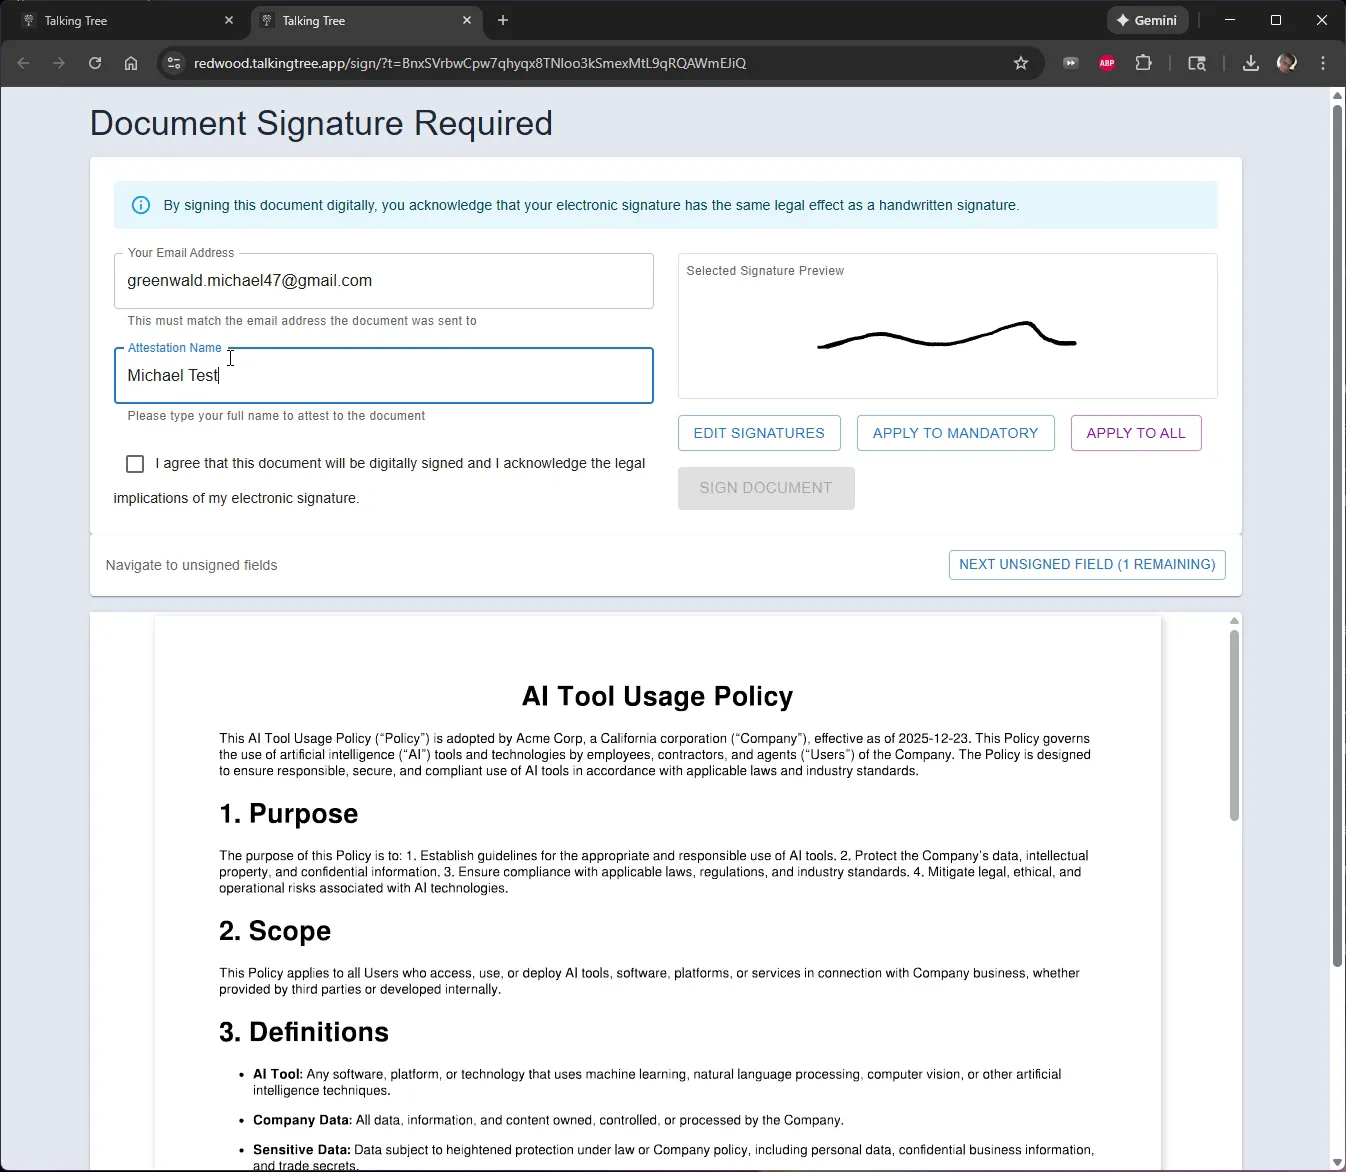
3. Agree to the Terms
Check the box confirming that you agree the document will be digitally signed and that you acknowledge the legal implications of your electronic signature.
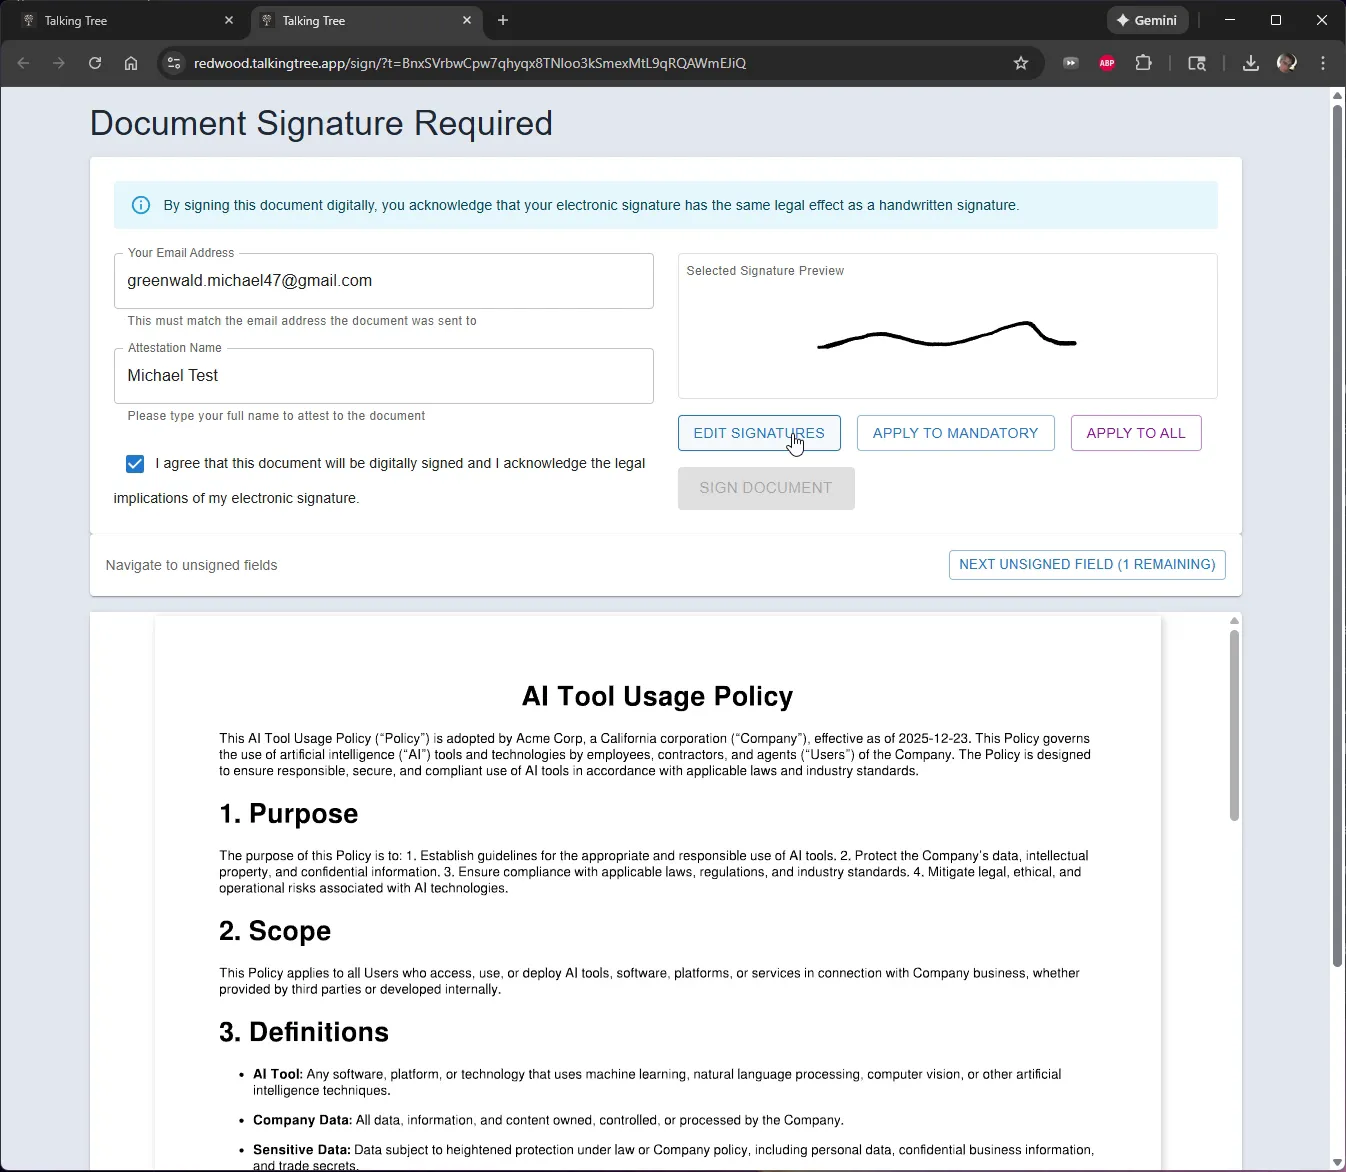
4. Review the Document
Scroll through the document displayed below the signing panel to review its full contents before signing.
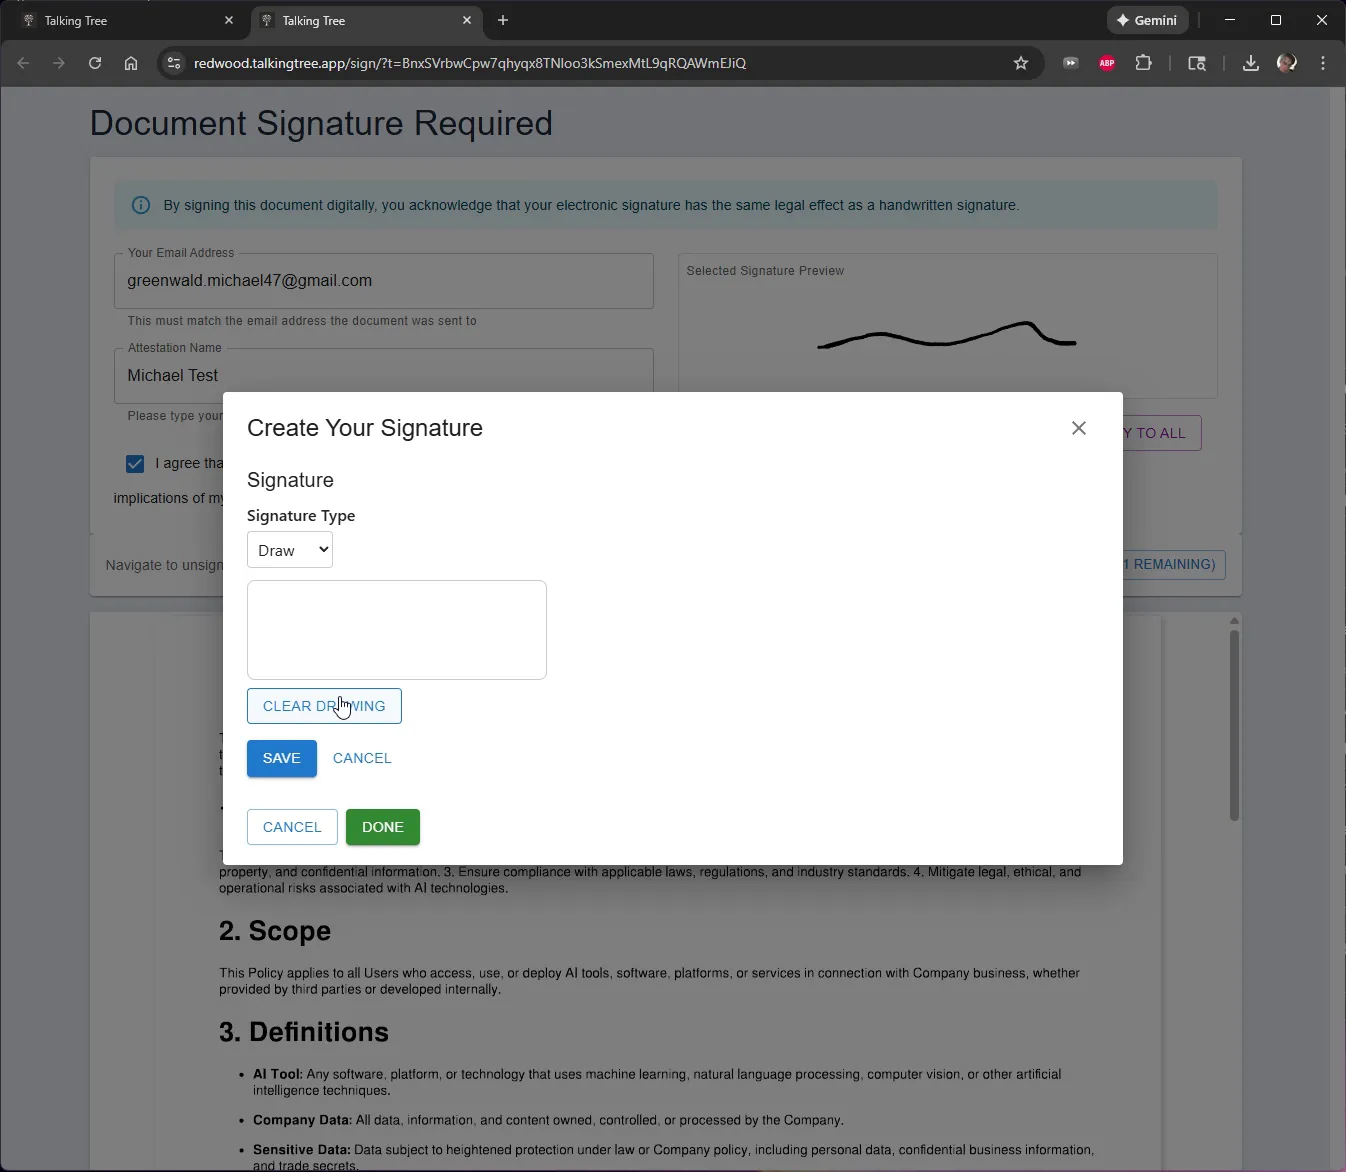
5. Open the Signature Editor
Click Edit Signatures to open the Create Your Signature dialog and customize your signature.
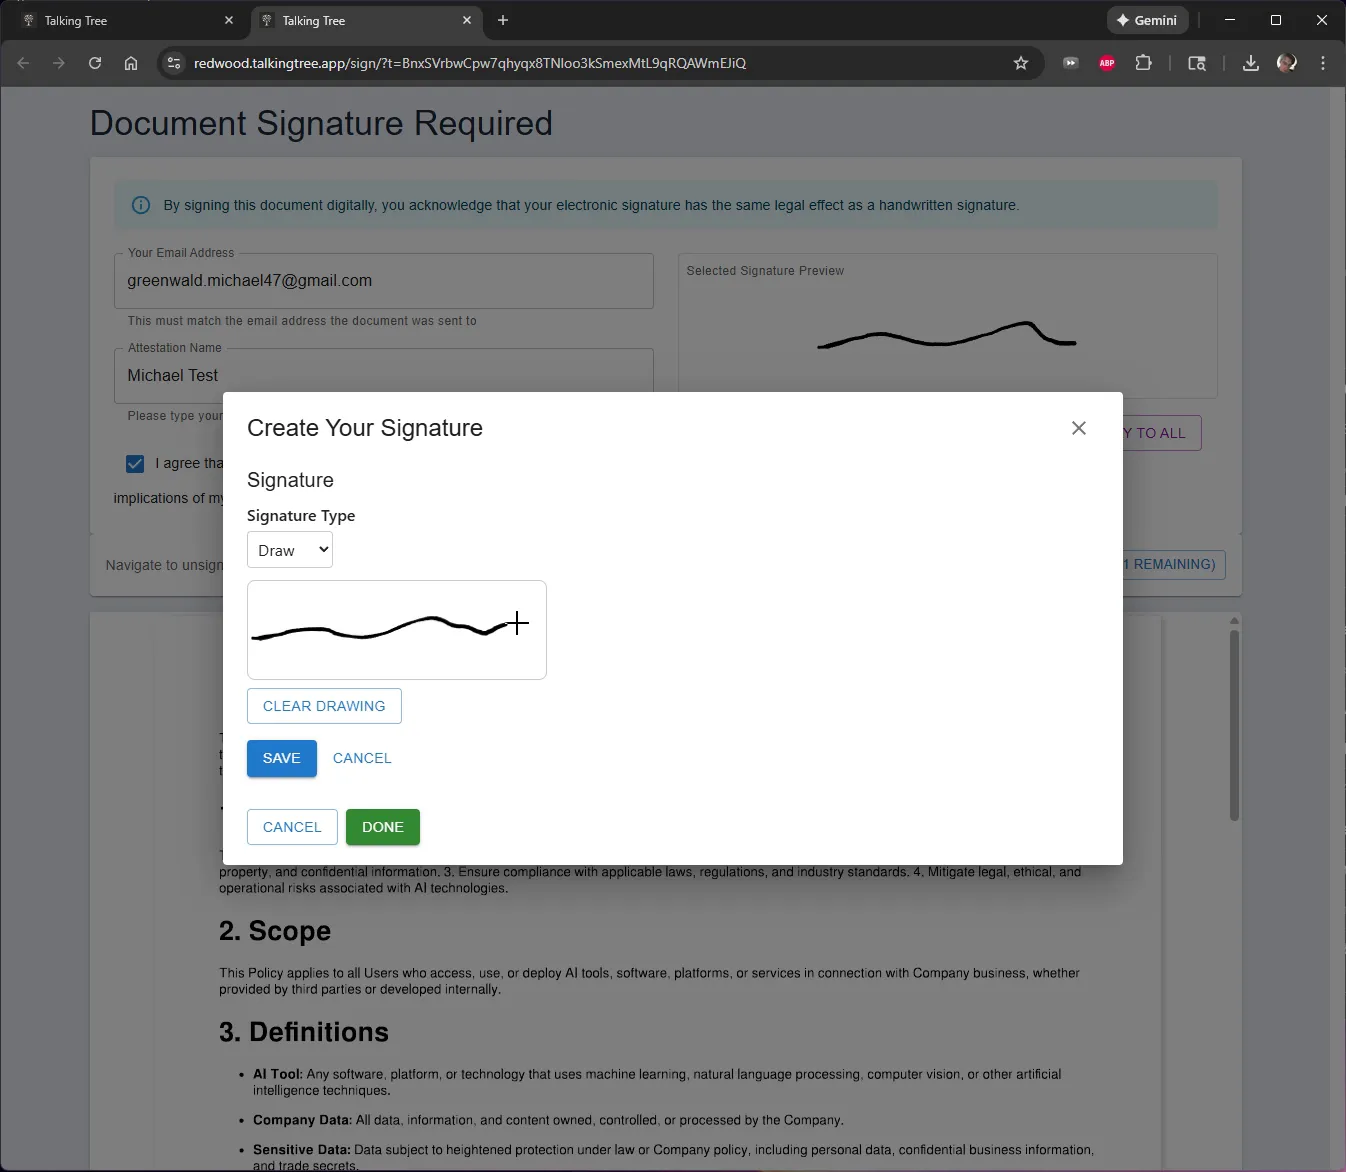
6. Draw Your Signature
Select Draw as the signature type and draw your signature in the input box using your mouse or trackpad.
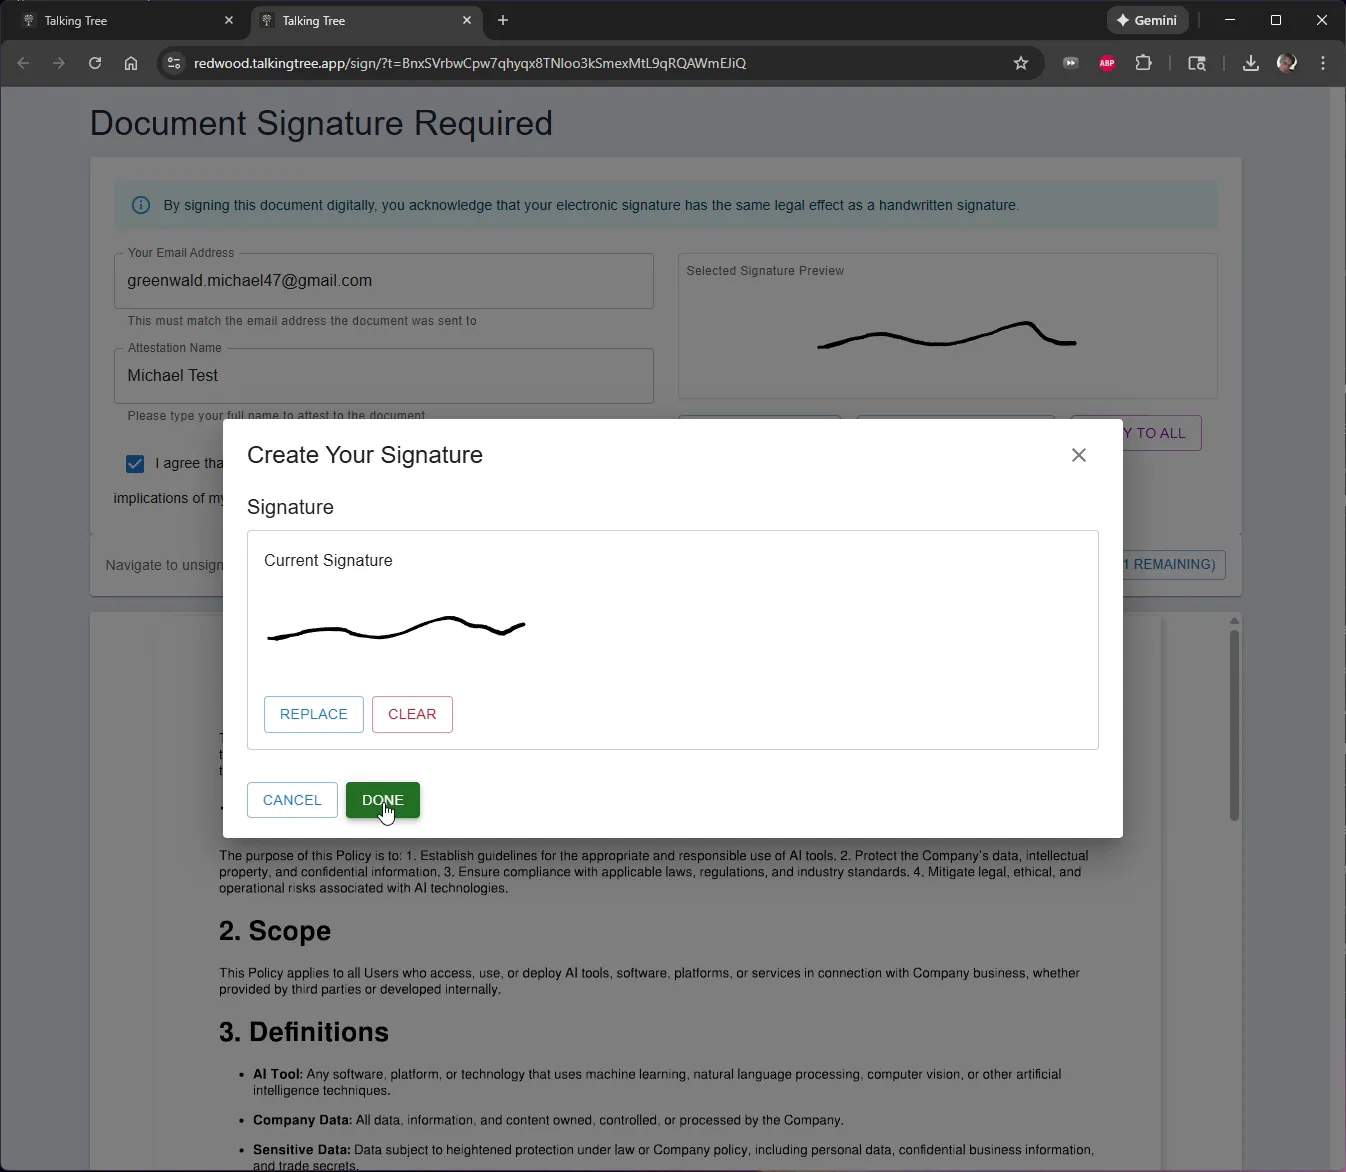
7. Confirm the Signature
Click Save to store the drawn signature, then click Done to close the dialog and return to the document.
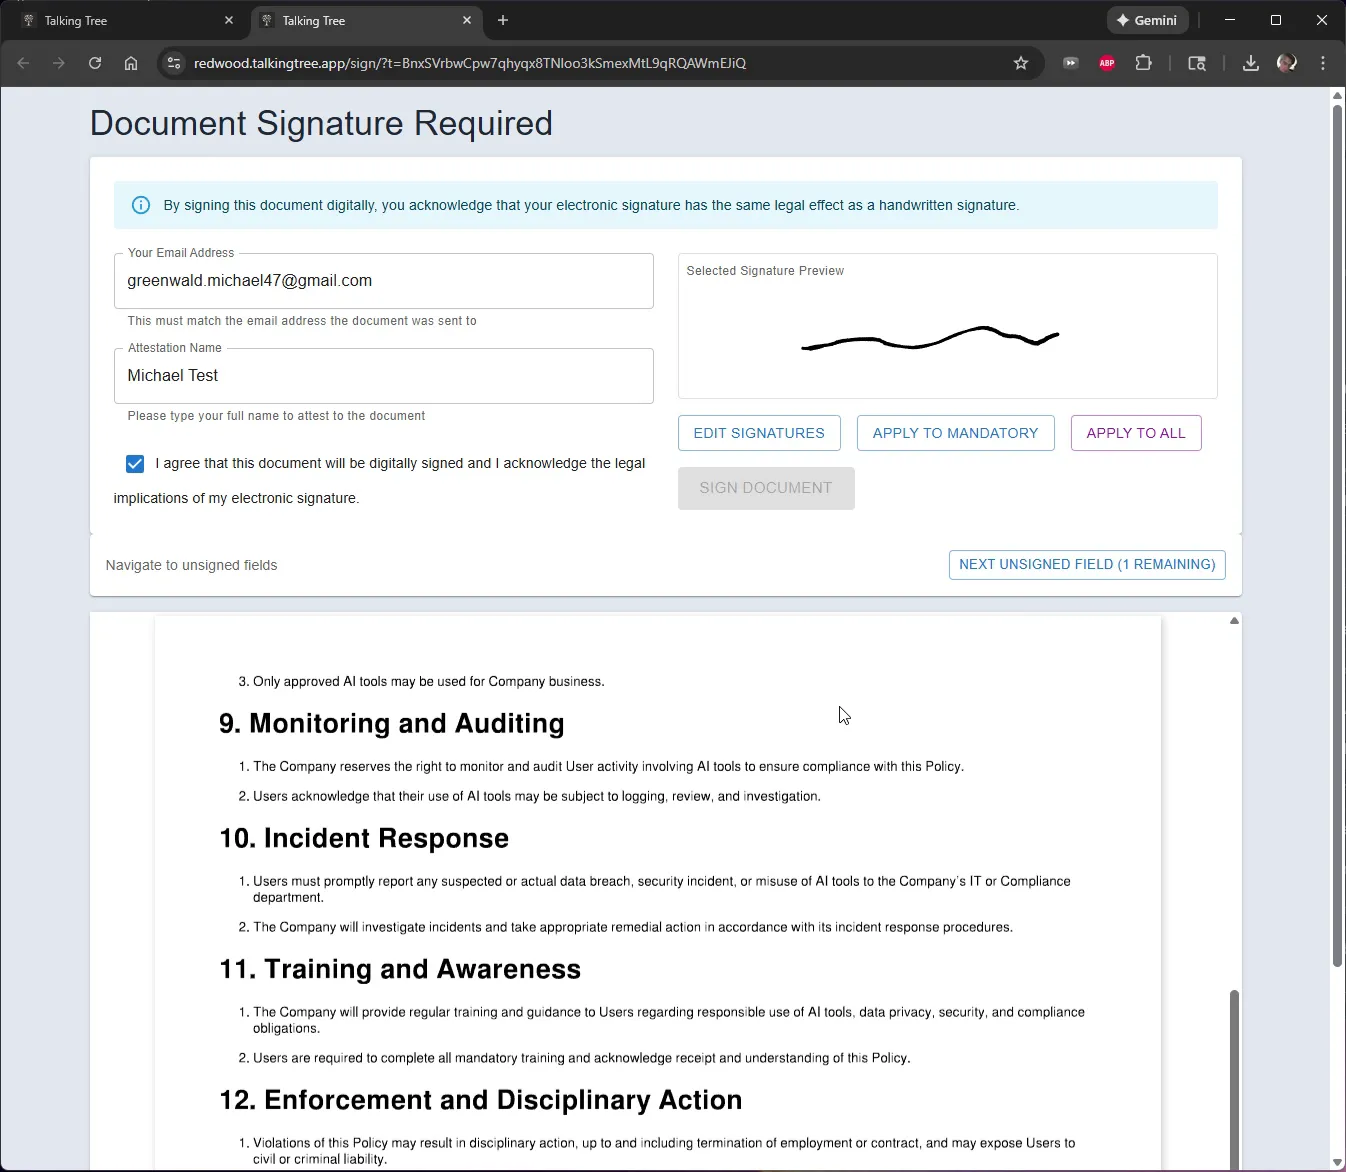
8. Apply the Signature to the Field
Scroll to the Employee Signature field in the document and click it to insert your saved signature.
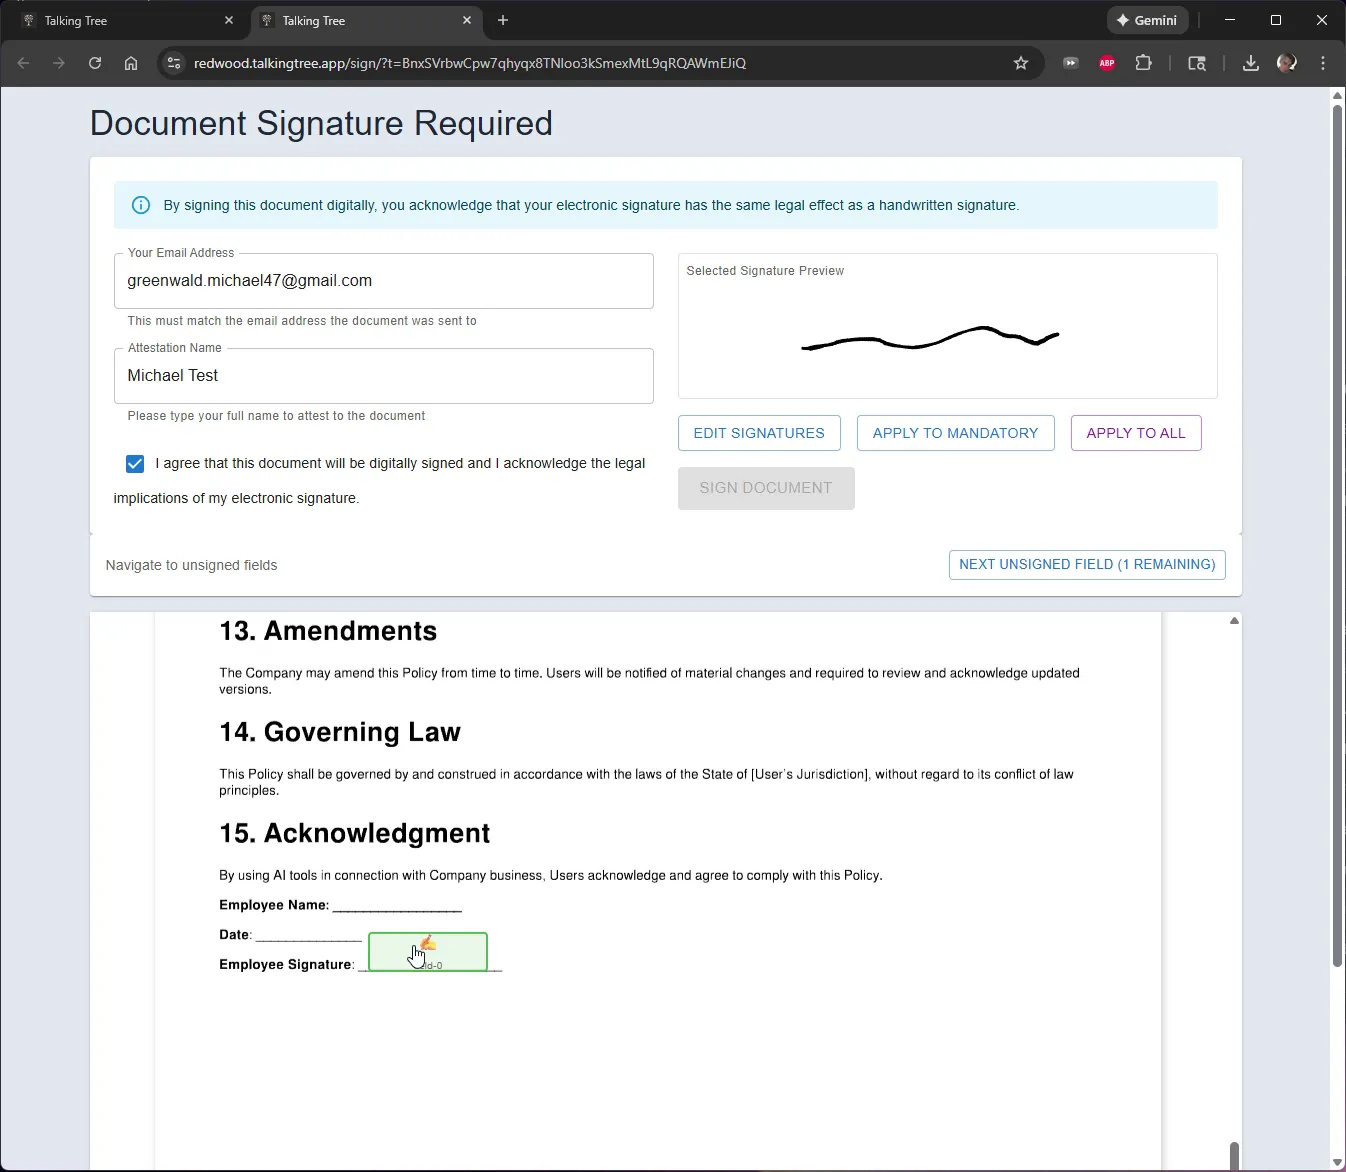
9. Sign the Document
With all fields complete, click Sign Document to submit your signature.
10. Confirm Successful Signing
The confirmation screen displays Document Signed Successfully, indicating your digital signature has been recorded.
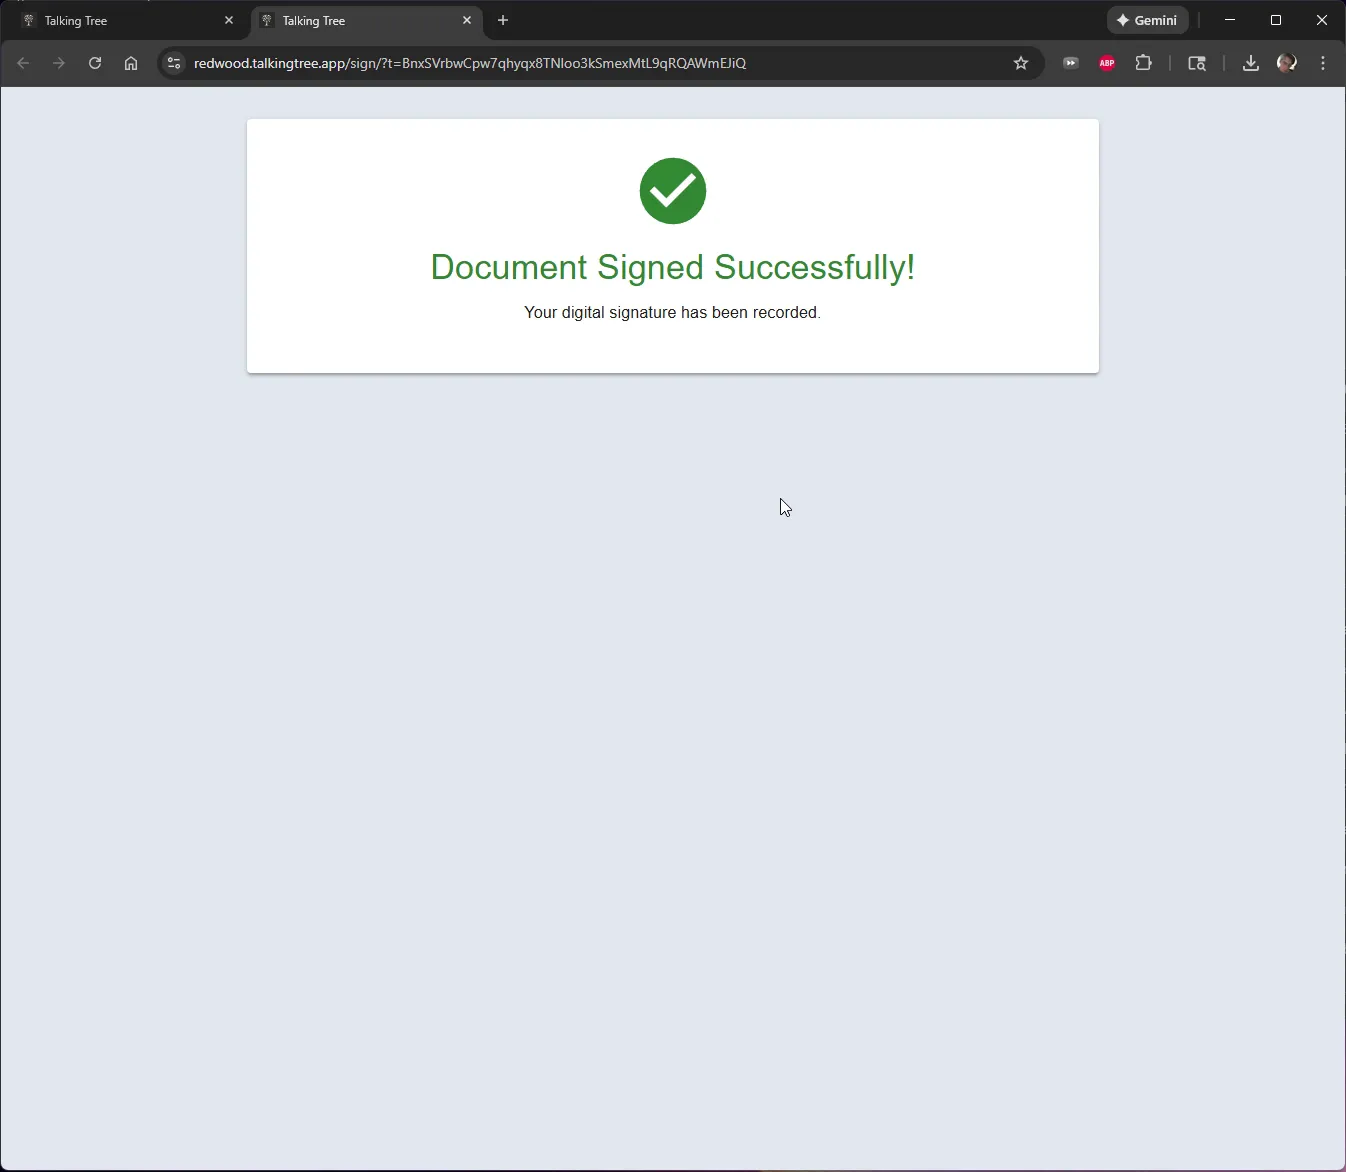
The signer has completed the document by entering their attestation details, applying a digital signature, and submitting it for recording.
You’re ready to put this workflow into practice.